Andarkan Music

Andarkan Music

627244329919983096
https://www.youtube.com/channel/UC3PXptw35Fx2H5lMCY4VJJA
2K
Followers
15
Following
6.7M
Runs
11.4K
Downloads
10.3K
Likes
58K
Stars

Articles

View All
 TensorArt Image Prompt Extractor

TensorArt Image Prompt Extractor

Discover the creative prompts behind your favorite AI-generated images with this simple and secure offline tool.Ever find an amazing AI-generated image and wish you knew the exact prompt used to create it? Many AI art platforms embed this data directly into the image file. The Simple Image Prompt Extractor is a lightweight, single-file HTML tool that allows you to easily read and display this hidden information.Because it runs entirely in your web browser, your images are never uploaded to any server, ensuring your data remains completely private and secure on your own computer.Key FeaturesInstant Prompt Extraction: Reads metadata from AI-generated images (PNG, JPEG, WebP) to find and display the embedded prompt.User-Friendly Interface: A clean, dark-themed design with an intuitive drag-and-drop area.Dual-Mode Upload: Supports both dragging files directly onto the page and selecting them via a traditional file browser.Clean, Formatted Output: Automatically removes unnecessary text like "prompt": and correctly formats line breaks (\n) for perfect readability.100% Private and Offline: All processing is handled locally by your browser. Your files never leave your machine.No Installation Required: It's just a single HTML file. Download it, open it, and you're ready to go.How to UseIt couldn't be simpler:Download the File: Save the prompt-extractor.html file to your computer.Open in Browser: Find the downloaded file and open it with any modern web browser (like Google Chrome, Mozilla Firefox, Microsoft Edge, or Safari).Extract the Prompt:Drag and drop your AI-generated image file directly onto the designated area.OR, click the "Select Image from Computer" button to choose a file manually.The tool will instantly process the file and display the extracted prompt in the result box.Download the tool now and start uncovering the secrets behind stunning AI art!
3
2
Decoding AI Art Prompts: Why "Score_9, etc" Won't Get You a Better Image.

Decoding AI Art Prompts: Why "Score_9, etc" Won't Get You a Better Image.

⛔️ DO NOT USE Score_9, Score_8_Up, Score_7_Up etc.AI-powered image generation has surged in popularity with models like FLUX, DALL-E 2, Stable Diffusion, and Midjourney producing highly realistic and imaginative images from simple text prompts. These tools have empowered users to create visual art with just a few words. However, understanding the inner workings of these models can help improve the quality of prompts and ultimately, the images they generate.🟥 What Are "Score_9, Score_8_Up" and Similar Terms?You may have seen terms like “Score_9” or “Score_8_Up” in discussions about AI-generated images. These terms refer to internal scoring mechanisms used during the training of AI models, where the system assesses images based on various quality levels. For example:"Score_9": Indicates the highest quality images during training."Score_5_Up": Refers to images of moderate quality, not as refined as those with a "Score_9."The system uses these scores during training to fine-tune the model and help it differentiate between images of varying quality. Over time, this process leads to better, more accurate output when the model is fully trained.(This section was added on 24.04.2025 with the warnings of valuable readers.)⚠️ PONY AND THE “SCORE” SYSTEMPony (PnoyXL) (especially Stable Diffusion-based or community fine-tuned models) is known to use a certain “aesthetic score” or “quality score” (e.g. on a scale of 4-9) when preparing training data sets or fine-tuning the model. These scores are usually given by another AI model (aesthetic predictor) or by human evaluators. Weighting images with higher scores (e.g. 8 or 9) more heavily in training, or using only high-scoring images, aims to make the model produce more aesthetically or technically successful images. Moreover, the use of the score_9 tag alone is insufficient in PONY, and the combination of at least three tags (score_9, score_8_up, score_7_up) produces consistent results. The internal architecture of the model interprets these scores as a kind of quality regulation mechanism.Next generation models such as FLUX.1, developed by large companies/laboratories, are usually trained on very large and diverse data sets. In order to ensure dataset quality, filtering or data selection according to specific criteria is used. Architectural innovations and the use of large-scale data are emphasized in the training of FLUX.1.Evolution of Industry StandardsApproaches to quality control in visual production models have gone through three main stages of evolution:Manual Ratings (2022-2023): Systems based on human evaluations.Semi-Automated Hybrid Systems (2024): CLIP score + human feedback loops.Fully Automated Self-Improving Algorithms (2025): Real-time adversarial optimizationIn light of these developments, it can be said that Pony's scoring system is a specific application that deviates from the general trends in the industry.🟨 Why Including These Scores in Prompts Is IneffectiveWhile these scoring mechanisms are crucial during model training, they serve no purpose when included in user prompts. Here’s why:🚷 Scores Are Internal: These scores are part of the model’s training process and are not accessible or relevant to the end-user prompt system. When you include terms like "Score_9" or "Score_8_Up" in your prompt, the model does not understand them as it would a descriptive term. Instead, it may interpret them as arbitrary text, which could confuse the output and lead to unexpected or undesirable results.⚠️ Prompts Should Be Descriptive, Not Coded: The AI models work best when given clear, descriptive language. Including internal scoring jargon could dilute the clarity of your prompt, resulting in less relevant or lower-quality images.🟩 How to Write Better AI Image PromptsTo create high-quality images, focus on providing the AI with precise, vivid descriptions. Here are some tips for improving your prompts:Use Clear, Concise Language: Be specific about what you want. Instead of relying on scoring terms, describe the image you envision. For example, instead of "Score_9", say "highly detailed portrait in soft lighting."Incorporate Key Details: Include information about the image’s colors, style, lighting, composition, and subject. The more detail you provide, the more likely the model will produce an image that aligns with your vision.Provide Style References: Mention well-known artistic styles, mediums (such as watercolor or oil painting), or even specific artists (if relevant). Alternatively, if you have a particular style in mind, including links to reference images can help guide the AI’s output.Experiment and Refine: AI image generation is still an evolving field. Don’t hesitate to tweak your prompts, try different combinations of words, or run multiple iterations to explore the model’s full capabilities. Experimenting is key to achieving better results.🟦 ConclusionWhile it may be tempting to use internal training terms like “Score_9” in your prompts, doing so won’t improve the quality of your AI-generated images. These scores are meaningful only during the model’s training phase and have no value when generating images for users. Instead, focus on crafting well-thought-out prompts using descriptive language, key details, and style references. With clear and specific instructions, you’ll be able to harness the full power of AI art generators and create visuals that align with your creative vision.📚ReferencesFLUX AI, DALL-E, and Midjourney documentation. (2023). Understanding AI image models and their scoring mechanisms.Brown, T., et al. (2021). "Language Models are Few-Shot Learners." OpenAI Research Paper.Chen, M., et al. (2022). "Learning Transferable Visual Models From Natural Language Supervision." Clip (Contrastive Language–Image Pre-training), OpenAI Research Paper.Radford, A., et al. (2021). "DALL·E: Creating Images from Text." OpenAI Blog.Zhang, R., et al. (2022). "Diffusion Models in Vision: A Comprehensive Survey." Stable Diffusion Research Paper.
160
22
FLUX1 - Mastering Camera Exposure to Achieve Realism in AI Image Generation - Leica Camera

FLUX1 - Mastering Camera Exposure to Achieve Realism in AI Image Generation - Leica Camera

When venturing into the realm of AI-powered image generation, precision in your prompts is paramount to achieving truly compelling results. While the term "realistic photo" might seem straightforward, it lacks the specificity needed to guide these systems effectively. AI image generators are literal interpreters, meticulously following your instructions. To unlock their full potential and generate images that feel authentic and believable, we must embrace a more nuanced approach. By incorporating detailed camera exposure commands into our prompts, we can provide the AI with a clearer roadmap, leading to more focused and visually striking outputs. Let's explore the power of these commands by experimenting with variations of a single prompt, observing firsthand how subtle changes can dramatically impact the final image.Try experimenting with this sentence by copying and pasting variations at the end, and experience the differences for yourself.① GeneralLeica M10-R, low exposure, high contrast black and white, ISO 100, with a 50mm prime lens.Result: Emphasizes texture with deep shadows and fine monochrome details.Leica SL2-S with tilt-shift lens, low exposure, high contrast, ISO 100, with a 45mm tilt-shift lens.Result: Produces a surreal perspective with precise focus and deep shadows, highlighting scale and architectural details.Leica Q2 Monochrom, low exposure, extreme high contrast, ISO 50, with a 28mm macro lens.Result: Highlights intricate details with a glowing outline, using backlighting for a dramatic effect.Leica S3, low exposure, high contrast, ISO 50, with a 120mm macro lens.Result: Captures sharp macro details with soft contrast, enhancing textures and reflections in fine details.Leica SL2 with long exposure, low exposure, high contrast, ISO 100, with a 35mm wide-angle lens.Result: Captures dynamic movement with streaks of light, enhancing the contrast of urban night scenes. For better separation of the subject and bokeh effect: 100mm lens.Leica M10 Monochrom, low exposure, high contrast, ISO 100, with a 50mm prime lens.Result: Delivers fine natural textures and detail, emphasizing delicate patterns with soft lighting.Leica SL2-S, low exposure, high contrast, ISO 50, with a 24-90mm zoom lens.Result: Captures architectural details with dramatic lighting and long shadows, creating a striking urban landscape.Leica Q2, low exposure, high contrast, ISO 50, with a 28mm prime lens.Result: Reveals light refraction and swirling colors in delicate textures, producing a magical and ethereal image.Leica SL2-S, low exposure, high contrast, ISO 64, with a 75mm prime lens.Result: Enhances botanical detail with soft lighting, revealing the intricate patterns of petals.Leica S3 with bellows extension, low exposure, high contrast, ISO 64, with a 100mm macro lens.Result: Highlights mechanical precision with sharp contrast and deep shadows, focusing on fine details.Leica M10-R with ND filter, low exposure, high contrast, ISO 50, with a 28mm wide-angle lens.Result: Freezes fast-moving water with strong contrast, capturing dramatic texture under harsh light.Leica Q2 Monochrom with polarizing filter, low exposure, high contrast, ISO 100, with a 28mm prime lens.Result: Captures abstract reflections and interplay of light, emphasizing contrasts on smooth reflective surfaces.Leica M10 Monochrom, low exposure, high contrast, ISO 400 (pushed to 800), with a 50mm prime lens.Result: Creates a moody, silhouetted image with vintage film grain and intense backlighting.Leica M-A with black and white film, low exposure, high contrast, ISO 400 (pushed to 1600), with a 50mm prime lens.Result: Utilizes deep shadows and grain to create a powerful and evocative monochrome scene.Leica M10 with infrared film, low exposure, high contrast, ISO 400 (pushed to 800), with a 35mm wide-angle lens.Result: Produces a surreal and ethereal image, highlighting hidden patterns with unique lighting effects.② Street & DocumentaryLeica M10-R, low exposure, high contrast black and white, ISO 100, with a 35mm prime lens.Result: Captures strong contrast and dynamic light interplay, emphasizing the urban textures and shadows.Leica Q2, low exposure, high contrast, ISO 100, with a 28mm prime lens.Result: Produces a stark silhouette with vibrant city lights creating dramatic contrast and a halo effect.③ Portrait & LifestyleLeica M11, low exposure, high contrast, ISO 200, with a 50mm prime lens.Result: Highlights natural light, creating an intimate and flattering portrait with soft shadows.Leica Q2 Monochrom, low exposure, high contrast, ISO 800, with a 28mm prime lens.Result: Emphasizes warm, romantic light, capturing candid emotions with nostalgic undertones.④ Landscape & ArchitectureLeica M10-R, low exposure, high contrast, ISO 100, with a 24mm wide-angle lens.Result: Enhances landscape drama, capturing long shadows and the grandeur of the scene with precise detail.Leica Q2, low exposure, high contrast, ISO 64, with a 28mm prime lens.Result: Showcases intricate architectural details with side lighting, bringing out textures and design elements.⑤ Reflection & AbstractionLeica SL2-S with tilt-shift lens, low exposure, high contrast, ISO 100, with a 45mm tilt-shift lens.Result: Creates a hyper-realistic scene with a unique perspective, using long shadows for dramatic effect.Leica Q2 Monochrom, low exposure, extreme high contrast, ISO 50, with a 28mm macro lens.Result: Emphasizes the fine details of a snowflake, using backlighting to create a glowing effect and enhance texture.⑥ Film & MoodLeica M10 Monochrom, low exposure, high contrast, ISO 400 (pushed to 800), with a 50mm prime lens.Result: Captures a moody silhouette with film grain and backlighting, enhancing the emotional depth of the scene.Leica M-A with black and white film, low exposure, high contrast, ISO 400 (pushed to 1600), with a 50mm prime lens.Result: Creates a powerful black-and-white image with deep shadows and film grain, emphasizing the drama and raw emotion.⑦ Still Life & AbstractLeica S3, low exposure, high contrast, ISO 50, with a 120mm macro lens.Result: Produces a sharp, high-detail macro image, capturing the delicate textures of a single water droplet with soft shadows.Leica SL2 with long exposure, low exposure, high contrast, ISO 100, with a 35mm wide-angle lens.Result: Captures dynamic city movement with long exposure, blending streaks of light and blurred motion for a high-energy urban image.⑧ Mechanical & DetailLeica S3 with bellows extension, low exposure, high contrast, ISO 64, with a 100mm macro lens.Result: Emphasizes fine mechanical details with deep shadows and sharp focus, bringing out the intricate craftsmanship of the vintage watch.🟨 FAQWhy are Hasselblad, Phase One, and Leica cameras the primary focus, when there are other great options?☝️ These three brands are known for their high-end cameras, which are often used by professionals due to their superior quality. Based on their training on the images produced by these high-end professionals, the algorithm, called artificial intelligence, focuses on producing output that reflects the exceptional quality associated with these brands.For Phase One Camera - https://tensor.art/articles/771043378340050555For Hasselblad Camera - https://tensor.art/articles/771012991446530480
268
34
FLUX1 - Mastering Camera Exposure to Achieve Realism in AI Image Generation - Phase One Camera

FLUX1 - Mastering Camera Exposure to Achieve Realism in AI Image Generation - Phase One Camera

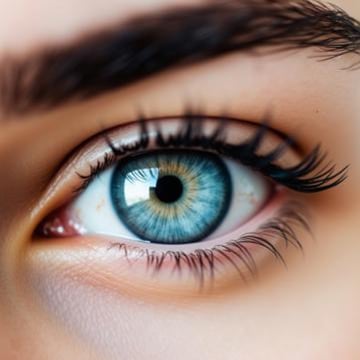
In the intricate world of AI-driven image creation, the precision of your prompts is crucial for producing captivating and authentic visuals. The phrase "realistic photo" might initially appear adequate, but it often falls short in providing the detailed guidance these sophisticated systems require. AI image generators interpret prompts with exacting accuracy, adhering strictly to the instructions given. To harness their capabilities fully and craft images that resonate with realism, we must adopt a more refined strategy. By embedding specific camera exposure commands within our prompts, we give the AI a well-defined blueprint, paving the way for sharper, more impactful results. Let's delve into the significance of these commands, experimenting with subtle adjustments to see how they can transform the final image.① General:Phase One XF IQ4 150MP, low exposure, high contrast black and white, ISO 50, with a 120mm macro lens.Result: Produces a highly detailed, high-contrast monochrome image with exceptional sharpness, emphasizing textures and fine details.Phase One XT Camera System, low exposure, high contrast, ISO 50, with a 90mm tilt-shift lens.Result: Creates a unique perspective with selective focus, enhancing depth and producing a miniature-like effect with strong contrast.Phase One XF IQ4 150MP, long exposure, low exposure, high contrast, ISO 50, with a 35mm wide-angle lens.Result: Captures a wide field of view with motion blur, combining sharp static elements with smooth, flowing movement in high contrast.Phase One XT with Rodenstock lens, low exposure, extreme high contrast, ISO 35, with a 50mm prime lens.Result: Delivers an image with extreme tonal range, sharp details, and deep shadows, ideal for dramatic scenes or subjects.Phase One XT IQ4 150MP, low exposure, high contrast, ISO 50, with a 120mm macro lens.Result: Renders minute details with exceptional clarity and strong contrast, perfect for close-up subjects and intricate textures.Phase One XT IQ4 150MP, low exposure, high contrast, ISO 50, with an 80mm prime lens.☝️ Result: Produces a balanced, high-contrast image with natural perspective, suitable for portraits or general photography with strong detail.Phase One XT Camera System, low exposure, high contrast, ISO 50, with a 28mm wide-angle lens.Result: Captures expansive scenes with dramatic contrast, emphasizing foreground elements while maintaining background detail.Phase One XT IQ4 150MP, low exposure, high contrast, ISO 50, with a 100mm macro lens.Result: Achieves extreme close-up shots with high contrast, revealing intricate structures and patterns invisible to the naked eye.Phase One XT Camera System, low exposure, high contrast, ISO 35, with a 120mm macro lens and bellows extension.Result: Enables ultra-close focusing with exceptional detail and contrast, ideal for scientific or artistic macro photography.Phase One XF IQ4 150MP, low exposure, high contrast, ISO 50, with a 150mm macro lens.Result: Provides high magnification with a longer working distance, producing sharp, high-contrast images of small subjects.Phase One XT IQ4 150MP, low exposure, high contrast, ISO 35, with a 45mm wide-angle lens and ND filter.Result: Allows for longer exposures in bright conditions, capturing motion blur with a wide perspective and strong contrast.Phase One XT IQ4 150MP, low exposure, high contrast, ISO 50, with a 50mm prime lens and polarizing filter.Result: Enhances color saturation and reduces reflections, creating vivid images with deep contrasts and clear details.Phase One XF IQ3 100MP, low exposure, high contrast, ISO 100 (pushed to 200), with a 80mm prime lens.Result: Produces a slightly grainy image with enhanced contrast, adding a subtle texture and mood to the photograph.Phase One XF IQ3 100MP, low exposure, high contrast, ISO 100 (pushed to 400), with a 50mm prime lens and black and white film.Result: Creates a high-contrast monochrome image with noticeable grain, evoking a classic film look with deep blacks and bright highlights.Phase One XF IQ3 100MP, low exposure, high contrast, ISO 100 (pushed to 200), with a 35mm wide-angle lens and infrared film.Result: Generates an otherworldly effect with unique tonal responses, emphasizing foliage and creating surreal landscapes with a wide field of view.② Nature & Macro:Phase One XF IQ4 150MP, low exposure, high contrast black and white, ISO 50, with a 120mm macro lens.Result: Produces a highly detailed monochrome image with stark contrast, emphasizing the finest textures and intricate patterns. The macro lens reveals minute details in the subject, while the high contrast creates a dramatic interplay of light and shadow.Phase One XT Camera System, low exposure, high contrast, ISO 50, with a 90mm tilt-shift lens.Result: Creates a unique perspective with selective focus, enhancing depth perception and producing a miniature-like effect. The tilt-shift lens allows for precise control over the plane of focus, resulting in a surreal, hyper-realistic image with areas of sharp detail contrasting with intentional blur.Phase One XF IQ4 150MP, long exposure, low exposure, high contrast, ISO 50, with a 24mm wide-angle lens.Result: Captures a wide field of view with dramatic motion blur, combining sharp static elements with smooth, flowing streaks of light. The long exposure creates a sense of movement and energy, while the high contrast emphasizes the interplay between light sources and shadows in the scene.③ Still Life & Abstract:Phase One XT with Rodenstock lens, low exposure, extreme high contrast, ISO 35, with a 90mm macro lens.Result: Produces an exceptionally detailed image with extreme tonal range, emphasizing the intricate structure of the subject. The macro lens reveals minute details, while the high contrast creates a striking separation between the subject and the dark background. Fine textures and delicate features are rendered with remarkable clarity.Phase One XT IQ4 150MP, low exposure, high contrast, ISO 50, with a 120mm macro lens.Result: Captures a highly detailed close-up image with strong contrast, perfect for revealing the subtle nuances of small subjects. The macro lens allows for extreme magnification, showcasing the perfect geometry of the subject. Reflections and refractions within the subject are rendered with exceptional clarity, creating a captivating interplay of light and form.Phase One XT IQ4 150MP, low exposure, high contrast, ISO 50, with an 80mm prime lens.Result: Delivers a sharp, high-contrast image that emphasizes texture and fine details. The prime lens provides excellent optical quality, rendering intricate structures with precision. The high contrast setting accentuates the interplay of light and shadow, bringing out the subtle variations in texture and form of the subject.④ Architecture & Urban:Phase One XT Camera System, low exposure, high contrast, ISO 50, Rodagon 45mm f/5.6 lens.Phase One XT Camera System, low exposure, high contrast, ISO 50, Schneider Kreuznach 80mm f/5.6 LS lens.Phase One XT IQ4 150MP, 100mm macro lens, low exposure, high contrast, ISO 50.Result: A high-contrast, dramatic image filled with intricate details and textures. The finest details of the architecture, especially stonework, ornamentation, and textures, will be accentuated and stand out.Phase One XT IQ4 150MP, 45mm wide-angle lens, low exposure, high contrast, ISO 50.Result: A powerful composition with a wide field of view, dramatic lighting, and a strong interplay of light and shadow. The overall structure of the architecture, its relationship to the surroundings, and the interplay with the sky will be emphasized, creating a visually striking effect.⑤ Mechanical & Detail:Phase One XT Camera System with bellows extension, low exposure, high contrast, ISO 35, with a 120mm macro lens.Result: Produces an ultra-detailed close-up image, emphasizing the precision and craftsmanship of intricate objects with sharp contrast.⑥ Botanical & Floral:Phase One XF IQ4 150MP, low exposure, high contrast, ISO 50, with an 80mm prime lens.Result: Captures fine botanical details, with a strong focus on textures and patterns through enhanced contrast.⑦ Motion & Texture:Phase One XT IQ4 150MP with ND filter, low exposure, high contrast, ISO 35, with a 35mm wide-angle lens.⑧ Reflection & Abstraction:Phase One XT IQ4 150MP with polarizing filter, low exposure, high contrast, ISO 50, with a 50mm prime lens.Result: Reduces reflections and enhances the subtle interplay of light on reflective surfaces, with a high degree of clarity and depth.⑨ Film & Mood:Phase One XF IQ3 100MP, low exposure, high contrast, ISO 100 (pushed to 200), with a 50mm prime lens.Result: Creates a high-contrast image with a clear silhouette and deep shadows, enhancing the sense of mood and atmosphere.Phase One XF IQ3 100MP with black and white film, low exposure, high contrast, ISO 100 (pushed to 400), with an 80mm prime lens.Result: Produces a dramatic black and white image with rich contrast, emphasizing emotional intensity and striking detail.Phase One XF IQ3 100MP with infrared film, low exposure, high contrast, ISO 100 (pushed to 200), with a 35mm wide-angle lens.Result: Generates a surreal, otherworldly image with unique light rendering, highlighting hidden textures and patterns.🟨 FAQWhy are Hasselblad, Phase One, and Leica cameras the primary focus, when there are other great options?☝️ These three brands are known for their high-end cameras, which are often used by professionals due to their superior quality. Based on their training on the images produced by these high-end professionals, the algorithm, called artificial intelligence, focuses on producing output that reflects the exceptional quality associated with these brands.For Hasselblad Camera - https://tensor.art/articles/771012991446530480For Leica Camera - https://tensor.art/articles/771052694124299213
57
5
Mastering Lighting for Film and Photography: Techniques for Pinpoint Precision in Prompts

Mastering Lighting for Film and Photography: Techniques for Pinpoint Precision in Prompts

Lighting in photography and film does much more than illuminate a scene; it establishes mood, defines space, and directs the viewer’s attention.Key LightThe key light is the primary light source in a scene, highlighting the subject and defining its form. By shaping shadows and bringing out details, it directs attention to the most important elements.Prompt: A subject illuminated by a key light placed at a 45-degree angle, creating balanced yet focused light on the face, with shadows gently falling to one side.Usage: Commonly used in controlled environments such as studio settings, formal interviews, or any setup where clarity and focus are essential.Fill LightingAn auxiliary light used to soften the shadows created by the key light, reducing contrast and ensuring a smoother transition between light and dark areas.Prompt: A portrait with soft shadows on one side of the face, illuminated by a key light, and a subtle fill light reflecting off a white surface, balancing the shadows for a smooth, even light.Usage: Fill lighting is often combined with key lighting in both photography and film to ensure softer shadows, commonly used in portrait photography or interviews.BacklightingBacklighting occurs when the light is positioned behind the subject, creating a rim of light that separates the subject from the background and often evokes a dramatic effect.Prompt: A dramatic portrait of an actor with a strong light source positioned behind, creating a glowing halo around the subject's head and casting the face into partial shadow.Usage: Frequently employed in portrait and fashion photography, as well as dramatic film scenes where clear subject separation is needed.Rim Lighting (Edge Lighting)Rim lighting, similar to backlighting, focuses on highlighting the edges of the subject, creating an outline that defines the subject against a dark or contrasting background.Prompt: A subject outlined by rim lighting, with bright highlights along the edges of the body and face, creating a clear separation from the dark background.Usage: This technique is favored in commercial and product photography, as it emphasizes texture and adds definition to objects or subjects.Three-Point LightingThree-point lighting involves using a key light, fill light, and backlight together to achieve a balanced illumination of the subject.Prompt: An interview setup with classic three-point lighting: a key light highlighting the subject's face, a fill light reducing shadows, and a backlight subtly separating the subject from the background.Usage: A versatile and widely used setup in film and photography, offering a balanced, natural look for interviews, portraits, and well-lit scenes.High-Key LightingHigh-key lighting creates a brightly lit scene with minimal shadows, producing an upbeat, clean atmosphere.Prompt: A brightly lit commercial scene with high-key lighting, using soft, even light across the subject with minimal shadows, creating an upbeat and clean atmosphere.Usage: Commonly seen in fashion photography, commercials, and comedy films where a positive and vibrant mood is essential.Low-Key LightingLow-key lighting involves minimal fill light, creating deep shadows and high contrast. This technique evokes mood, mystery, or tension.Prompt: A moody film noir scene, where the subject is dramatically lit with low-key lighting, creating deep, dark shadows and high contrast between the illuminated areas and darkness.Usage: Popular in suspense, horror, and drama genres, this lighting style is perfect for adding intensity and emotional depth to a scene.Hard LightHard light produces sharp, distinct shadows, usually from a direct and focused light source, emphasizing texture and detail.Prompt: A gritty, intense portrait with hard lighting from a spotlight positioned directly above, casting sharp shadows across the face and emphasizing the texture of the skin.Usage: Best used in intense, dramatic scenes where texture and details need to be brought to the forefront.Soft LightingSoft lighting involves diffused light that wraps around the subject, creating soft shadows and a more flattering appearance.Prompt: A warm and inviting interior scene, softly lit by natural light through a window, with diffused, soft shadows and smooth transitions between light and dark areas.Usage: Ideal for portrait and beauty photography, soft lighting is perfect for creating warmth, tenderness, or a soft, inviting atmosphere.Motivated LightingMotivated lighting mimics natural light sources within a scene, such as sunlight or a lamp, but is enhanced for visibility and effect.Prompt: A dimly lit room where the light appears to come from a desk lamp, but off-screen lighting subtly enhances visibility, casting natural, warm light on the subject without overwhelming the scene.Usage: Used in film and photography to create realism while maintaining control over the lighting.Practical LightingPractical lighting refers to light sources visible within the scene, such as lamps, candles, or sunlight.Prompt: A cozy living room scene illuminated by practical lighting, with a warm glow from table lamps and a flickering fireplace, casting soft, ambient light around the room.Usage: Ideal for naturalistic settings where the light source is also a prop within the scene.Natural LightNatural light, often dynamic and uncontrolled, comes from the sun or other outdoor sources and can create stunning effects.Prompt: A serene landscape during golden hour, bathed in soft, natural sunlight, with long, warm shadows stretching across the ground and the sky glowing with orange and pink hues.Usage: Perfect for outdoor photography, documentaries, and scenes where a realistic, organic feel is required.Bouncing LightBouncing light involves reflecting light off a surface, such as a wall or reflector, to soften and diffuse its effect.Prompt: A portrait using bounce lighting, where light from a flash is reflected off a white ceiling, creating a soft, even illumination across the subject’s face, reducing harsh shadows.Usage: Frequently used in portrait photography to reduce the harshness of direct lighting and create a natural, flattering effect.Light-ChiaroscuroChiaroscuro lighting creates strong light-dark contrasts with sharp transitions, adding drama to the scene.Prompt: A dramatic scene with chiaroscuro lighting, where the subject’s face is half in shadow, and the other half is illuminated by a single light source, creating strong contrasts between light and dark.Usage: Common in film noir, baroque art, and moody, dramatic photography to enhance emotional intensity.Rembrandt LightingNamed after the painter, Rembrandt lighting creates a small triangle of light under the subject’s eye on the shadowed side of the face.Prompt: A classic portrait with Rembrandt lighting, where a key light creates a small triangle of light on the shadowed side of the face, adding depth and drama to the subject’s expression.Usage: Often used in portrait photography to create a timeless, dramatic effect.Split LightingSplit lighting divides the subject’s face into two halves, one side lit and the other in shadow, creating a strong, intense look.Prompt: A moody, dramatic portrait with split lighting, where one half of the subject’s face is fully illuminated by a hard light source, while the other half remains in complete shadow, creating a stark, intense look.Usage: Ideal for moody or dramatic scenes, this technique is often used to highlight a character’s duality.Butterfly LightingIn butterfly lighting, the light is placed above and in front of the subject, creating a soft shadow under the nose in the shape of a butterfly.Prompt: A beauty portrait using butterfly lighting, where the light source is placed above and in front of the subject, casting a soft, symmetrical shadow under the nose and emphasizing the subject's cheekbones.Usage: Perfect for beauty shots or anytime symmetry is needed in a portrait.Loop LightingIn loop lighting, the key light is placed above and to one side of the subject, casting a soft shadow beneath the nose.Prompt: A portrait lit with loop lighting, where the key light is positioned above and to the side of the subject, casting a soft, rounded shadow beneath the nose, while gently illuminating the rest of the face.Usage: Widely used in portrait photography, offering a flattering and balanced effect.Silhouette LightingIn silhouette lighting, the subject is backlit, casting the details in shadow and highlighting only the outline.Prompt: A dramatic silhouette of a person standing against a bright sunset, with the subject's outline darkened in front of a glowing, colorful sky, the features completely in shadow.Usage: Used for mystery, anonymity, or artistic effect, often in dramatic or emotional scenes.Top LightTop lighting involves placing the light source directly above the subject, creating deep shadows beneath the eyes and chin.Prompt: A horror scene illuminated by top lighting, with a single light source directly above the subject, casting deep, eerie shadows under the eyes and chin, creating an unsettling and tense atmosphere.Usage: Ideal for horror, suspense, or scenes where tension and isolation are key elements.UnderlightingUnderlighting, where the light source is placed beneath the subject, creates an unnatural or eerie appearance.Prompt: A spooky scene with underlighting, where a flashlight is held under the subject’s face, casting unnatural shadows upwards and giving the subject a ghostly, menacing appearance.Usage: Commonly used in horror films or to create a sense of danger or unnatural phenomena.💡 Cinematic lightingthese techniques are often combined and harmonised with each other. For example, Three-Point Lighting can be used in a scene, but can be adjusted to create a darker and mysterious atmosphere with the Low-Key Lighting technique.Remember, cinema lighting is a creative process and the best results are achieved by selecting and applying techniques that suit the story and the mood of the scene
54

Posts